
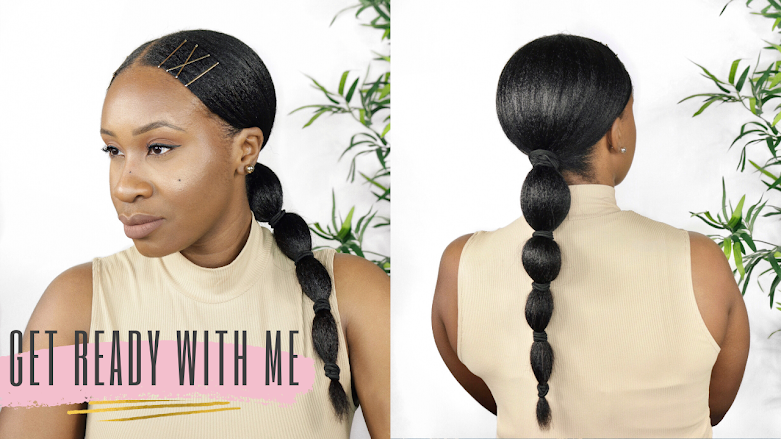

Without a doubt, braid outs are easily my favourite low manipulation style! Braid outs give me beautiful waves, poppin' curls and luscious texture allowing me to wear my hair down without the use of heat!
For the past year, I've been experimenting with products that would give me the most definition, moisture and hold when wearing a braid out and I believe I've found them! The Creme of Nature Argan Oil Product line.

The Leave-in Hair Milk (which has the exact same ingredients as the Buttermilk Hair Milk Leave-in) provides slip and moisture instantly as you apply it. It's protein-free and works great on both wet/damp or dry hair. The slip aids in detangling, smoothing and improving manageability in my hair. This leave-in lotion has a thick yet creamy consistency which provides the right amount of moisture to prep for my braid outs preventing it from drying out. It doesn't weigh my hair down either allowing my braid outs to look full with movement.
The Foam Lotion, the glue that keeps the style for 3+ days, is so moisturizing! It contains Olive oil, Honey and Aloe to hydrate and soften the hair while providing lasting hold. I just use one pump per braid as it easily spreads throughout the hair. It doesn't leave my hair sticky or tacky either. It's a gem!
The Gloss & Shine Mist is a light finishing product that really imparts shine into my hair completing the overall look. I love the smell and the conditioning it provides. It's light weight so it doesn't weigh my hair down. I spray my braids prior to unraveling to prevent frizz. The process of separating and fluffing each section can cause frizz and flyaways - if you're not careful! The Gloss & Shine Mist stops frizz in its tracks during the separating and fluffing process. It works like a charm!

When using these 3 products together, I've consistently received great results! It's the worst having a dry undefined braid out but these products all work well together imparting moisture, definition, hold and shine into my relaxed hair!
Do you have your staple products for Braid outs? If so, what are they?

Hey guys!! So I'm back with another video, this time I'm sharing with you exactly how I achieve my super defined braidout on 11/12 week post relaxed hair. A few weeks ago I shared a photo of my braid out on Instagram (@hairlicious) for "TEXTURETUESDAY and several of followers asked for a video tutorial showing how I achieved this look. So here we are!
Braidouts are my favourite low manipulation style to do while stretching and they are super easy to do! I'll typically do my braidouts on air dried hair after my mid week wash day routine i.e. Thursday. I'll rock my braid out until the next wash day i.e. Sunday.
To preserve my style for 3-4 days, I do the "Pineapple Method" where I gather my hair into a high ponytail, instead I do a secure top bun and wrap my hairline with my satin scarf. I also moisturize daily but using a tiny amount of my Leave-in Hair Milk and I'll scrunch the product into my hair/ends, fluff and go!
COMMENT BELOW if you are a fan of Braidouts too!
♥Items/Products Mentioned:
1. Creme of Nature Argan Oil Buttermilk Leave-in Hair Milk
2. Creme of Nature Argan Oil Foaming Wrap Lotion
3. Creme of Nature Argan Oil Shine Mist
4. Perm rods (7)
5. Wide tooth comb
As always, thanks for watching! Oh, and don't forget to SUBSCRIBE :)
xoxo
Braidout Tutorial on Dry Relaxed Hair - Ft. @CremeofNature Argan Oil Product Line
Braidouts Friday, February 09, 2018
There's nothing I love more than a well defined Braidout!! ... Is it just me?!
There's just something about the waves/curls, body and fullness that I fall in love with each time I rock this style.
For years, Braidouts have been my "go-to" low-manipulation-heat-free-style of choice and perfect for any event or occasion. It's easy to do and the results are consistent! What I love most is that I can rock my Braidout for at least 2-3 days after, giving my hair a break from further manipulation!
To achieve 2nd and 3rd day hair, at night all I do is scrunch some moisturizer (i.e. like a hair milk or butter) into my ends and put in a top knot bun. I protect the perimeter of my hair line with my satin scarf - that's it! The next morning I fluff, separate and go!
Check out the tutorial below on How I Achieve my Braidouts (step by step) featuring the Creme of Nature Argan Oil Product line.
Step 1 - I grab a section of freshly air dried hair. No need for neat parts.
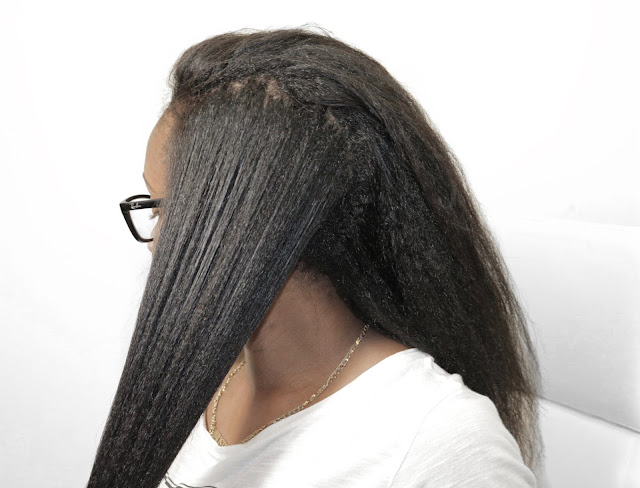
Step 2 - I squeeze a quarter size amount of Creme of Nature Argan Oil Buttermilk Leave-in in my hand and apply this amount per section as my moisture base.

Step 3 - I rub it in thoroughly from root to tip.

Step 4 - I use Creme of Nature Argan Oil Foam Lotion, squirt one pump per section, to set the braids and provide definition.

Step 5 - After working the product into the hair, I spray (1x/section) my Creme of Nature Argan Oil Gloss & Shine Mist

Step 6 - I begin to braid the section firmly. I take my perm rods and roll the ends up to shoulder length for fullness and curl.

Step 7 - Continue to section off the hair, braid and apply perm rods to the ends. No need for neat parts. I finish with a total of 6 sections.
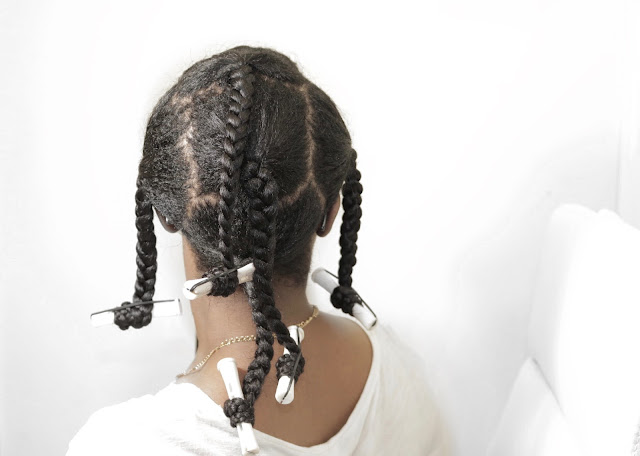

Step 8 - I wrap the perimeter of my hair with a satin scarf to prevent frizz. I also cover the braids in a satin bonnet for added protection.


Step 9 - I unravel the braids the next morning. I like to add more Gloss and Shine Mist to my finger tips to prevent frizz when unraveling the braids. I take a wide tooth comb and lift the roots for added volume and fullness and to remove the "parts". I gently separate the waves/curls.


Step 10 - All done!!

What method/products do you use to create the perfect Braidout?

I achieved this look with the help of just 2 products i.e. Care Free Curl Gold moisturizer and my Jojoba oil as a sealant. I applied the products on damp co-washed hair and I co-washed with Pantene Relaxed Moisturizing Conditioner. Very simple!
I chose Care Free Curl Gold because it locks in moisture, helps to detangle my strands and it gives my waves a nice shine/sheen. My waves don't revert or frizz. I love how it goes me that wet n wavy look. I typically get 2-3 day hair by putting my hair in a "pineapple" at night. Low manipulation is key!
Sometimes I'll wear it down with accessories, other times I wear it half up half down or with a top knot!
Check out my video on how I achieved these looks:
Twist out with Luster's Pink Curl & Twist Pudding & Leave-In Conditioner!
Low Manipulation Style Saturday, February 04, 2017
Lately, I've been using the Luster's Pink Shea Butter Coconut Oil line in my day-to-day hair routine. I think I've found a few favourites. I've noticed myself reaching more and more for the Silkening Leave-in Conditioner as the last step on wash day. This product works so well on damp hair, it's creamy and the slip is crazy - with no 'cones!!

The Curl & Twist Pudding has a 'jello-like' consistency yet dissolves easily between your fingers. A little goes a long way giving me a soft/medium hold and it smells amazzzing!!
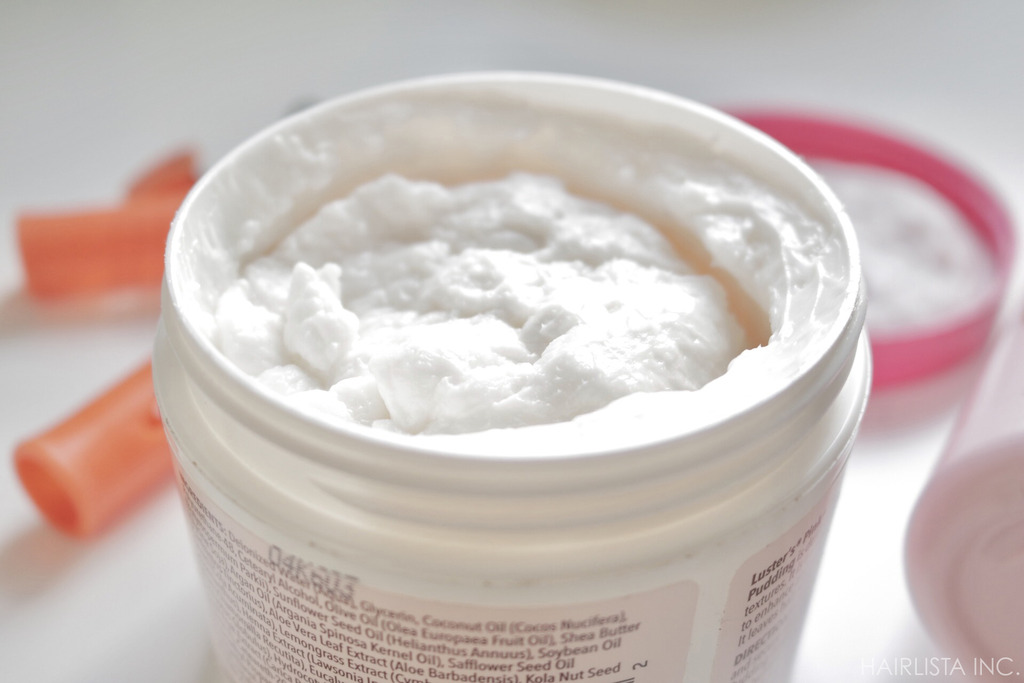

I did a twist out on slightly damp hair using the Curl & Twist Pudding along with the Silkening Leave-in Conditioner and I'm happy with the way it turned out.
My steps were super easy! I made 6-8 undefined sections in my hair, two-strand twisted each section (after applying a little bit of both products) and secured my ends with orange perm rods - went to bed! I unraveled my twists in the AM. Results below!


What's the best "go-to" style when you're tired of your old limp flat ironed hair? CURLSSS!!
My hair is approximately 7 days post flat iron (I try to stretch it as long as possible) and I was just bored of the constant straight look! I wanted some curls and volume without the use of extra heat, so I grabbed my trusty 1" inch satin pillow rollers, my Creme of Nature Argan Oil Setting Foam Lotion and went to work! Side note - if you know me, I'm not a fan of using excessive rollers or flexi rods in my hair to achieve a certain look. I like to take the minimalistic route and use just enough rollers to cover my hair.
Products/Items I used:
1) Creme of Nature Argan Oil Foam Setting Lotion - I used the Creme of nature foam setting lotion sparingly as I didn't want to saturate my ends to the point of reversion. I used half a pump (or less) per section to set my curls overnight.
2) 1" Satin Pillow Rollers - I used a total of 9 rollers all over. I placed a satin pillow roller in the front of my hair for extra curl and volume to frame my face. For the rest of my head, I placed 4 satin rollers per side (8 rollers in the back and 1 in the front). To achieve the curl, I wrapped my hair around the satin roller, to create that coily "look", starting from the mid shaft first - not the ends. The satin material prevented my ends from frizz and drying out.

My Hair Before:


3) Satin Scarf & Bonnet - I covered my hair with a satin scarf to keep my hairline tamed. I then used my bonnet, for extra measures, to keep everything under control while I sleep.
4) Hicks Edge Control - In the morning, I used a little bit of my Hicks edge control to tame my baby hairs down. I used a toothbrush to smooth it down for all day hold.
Here are my results:


I enjoyed this style so much and I must say it was effortless! My curls lasted pretty much all day long, although they dropped slightly. The hold I received from the CON Argan Oil Foam held up pretty well without feeling dry or crunchy.
As I mentioned before, the satin pillow rollers prevented my hair/ends from drying out, which was a bonus! My hair had bounce, shine and body which is exactly what I wanted to achieve! Most importantly, it's heat free, which means guilt free :)
Have you used satin pillow rollers in your hair? How did you like it?

Hey Hairlistas!
In this video I share with you how I "dress up" my old flat ironed hair. In the video my hair was 7 days post flat iron. Usually around 5-7 days my flat ironed hair tends to look a bit dull. Adding these cute accessories and a simple flat twist adds life to my hair allowing me to stretch-out my flat ironed style a bit longer.
Thanks for watching!!
Items/Products Mentioned:
Goddess Hair/Head Chain: http://amzn.to/1NXPNtf
Two braids Black and Gold Headband: http://amzn.to/1UUOPDw
Hicks Total Transformation Edge Control: http://amzn.to/1NXQ27t
What styles do you like to do on old flat ironed hair? Do you like to wear hair accessories?
Video: Braid-out Tutorial | Creme of Nature Straight From Eden
Braidouts Wednesday, September 02, 2015

This wash day was by far fun and full of uncertainty for the simple fact that I decided to try out Perm Rods for the very first time! These perm rods are part of a mini Beauty Supply Store haul I did a couple days ago. I'll share that in another post soon! Perm rods have been on my 'must-have' list for a while now. To be honest though, putting rollers of any sort scare me due to the lack of comfort at night - my sleep comes first!!! Sleeping in the rods wasn't as bad as I anticipated. It just takes getting used to. Next time, as an alternative, I'll just go under the dryer for an hour or so to speed up the drying time.
I'm loving the curls! It's the perfect heat-free low manipulation style for the summer. This healthier alternative just might be my go-to style for special occasions for the next couple months.
Anyway, I must say that for my first perm rod set, my results came out better than I expected - especially dealing with my 10/11 week post new growth. My hair came out fluffy, full of movement, shine and moisture! Ohhh the shine!!! I can't get over the amount of shine in my curls. I think the 'As I Am Twist Defining Cream' was the culprit. It does exactly as promised! Overall, it was a happy wash day indeed. Check out the dets below!
Wash Day Products & Steps:
- Deep Conditioned: Applied Keracare Humecto (mixed with Olive Oil, Coconut Oil and Avocado Oil) to dry hair for 30 minutes under heat.
- Cowashed: Cowashed with Aussie Miraculously Smooth under running water focusing on roots/scalp.
- Air dried: No product used while air drying. Detangling was a breeze!
- Moisturized: Applied As I Am Twisting Defining Cream section by section from root to tip!
- Styling Product: Applied a tiny layer of Creme of Nature Argan Oil Foaming Mousse in sections for extra hold.
- Perm Rods: Finger parted my hair and began to wrap each section around the Perm rods (I refused to make defined parts due to lack of time so I basically placed the perm rods all over).
- Take Down: Carefully separated each curl with a bit of Argan oil to prevent frizz.

Styling Products:

Perm Rods in place:

Results:


Until next wash day...

My Wash Day Run-Down:
Pre-poo: I applied Extra Virgin Coconut Oil to my hair while dry. I left my pre-poo on for 20-30 minutes with a plastic cap.
Co-wash: Rinsed out the EVCO and grabbed my lovely Aussie Smooth conditioner to co-wash my roots/hair. Love this stuff - it's truly moisturizing and detangling!!!
 Air dried: I t-shirt dried for 15-20 minutes until my hair was just slightly damp. I applied some Scurl No Drip Activator mixed with Creme of Nature Argan Oil Foaming Wrap Lotion to set my hair for increased definition in my braid-out. I sealed my hair with the Creme of Nature 100% Pure Argan Oil to lock in moisture. I then started to section off my hair in 5 sections and began to braid. I added perm rods to the ends of each braid. I air dried my hair overnight and removed my braids in the morning with a little bit of CON Pure Argan oil on my finger tips to prevent frizz.
Style: Since I'm freshly relaxed, braid-outs don't always come out looking 100% because I have no new growth. It can be a hit/miss. I opted for the half up top knot for a more chic trendy look, plus I was celebrating my birthday so I wanted something fun and cute :)
I gently used a boar bristle brush on my hairline and edges for smoothness. I secured the section with a ponytail holder and began to two-strand twist the remaining hair - wrapped it around & pinned it down! My hair felt so soft and smooth - just the perfect combination for a braid out :)
Results: My Birthday hair :)... out and about!

Until next wash day....
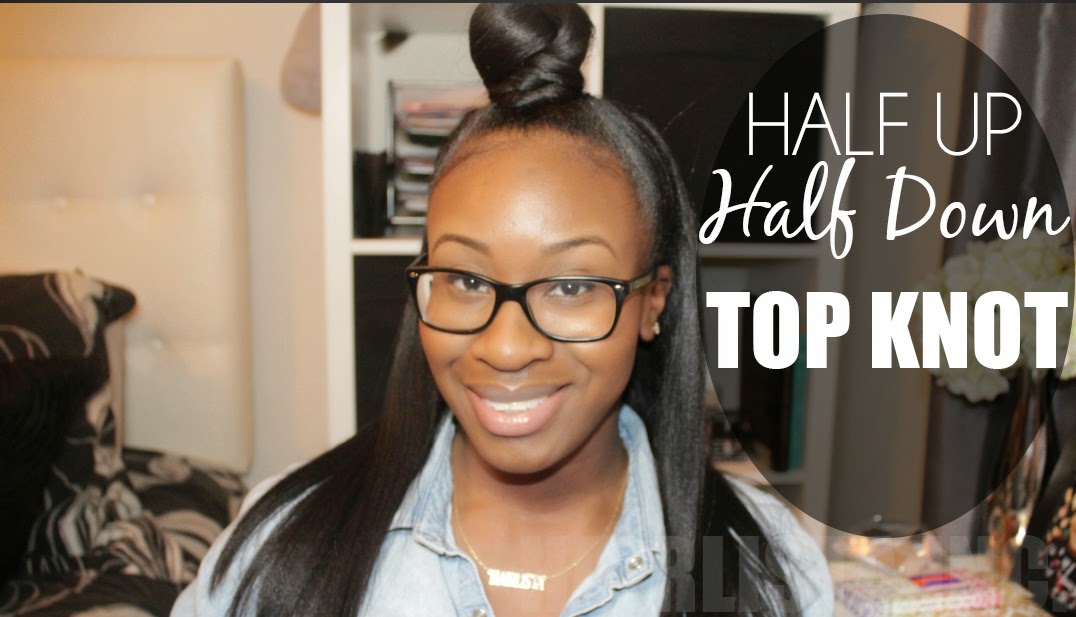
This highly requested video is now live! I still obsess over top knot styles because they are so easy to do and they look so trendy! It literally takes a couple minutes to achieve this look, not to mention, you only need a few products to do it.
Check out my video below & get the look!
Thanks for watching!

When I’m stretching my relaxer I like to do low manipulation styles to camouflage my new growth. Twist-outs are fun and playful. They give me just the right amount of volume and wave to spice up my hair. The best part is, they are super easy to do and great for any occasion!
Products Used:

Step 1
I like to moisturize and seal my hair first to lock in moisture. I then part my hair in 5 sections. I apply 1 pump of my favourite foam lotion to each section. Twist it up and clip. Take one section, split it in two (2).
Step 2
I grab one of those sections and begin to two-strand twist all the way down to my ends. I twist each section tightly for more curl definition.
Step 3
Starting from my ends, I roll the perm rod all the way up to my roots.
Step 4
I continue to twist my entire head until complete. Each section should have 2 two-strand twists with perm rods on the ends. I have a total of 10 sections. At this point, I go under the hooded dryer for 15-20mins to allow the foam lotion to set. I throw on my satin bonnet and go to bed.
Results:

Are you a twist-out fan? What method do you use?
![About [span]me[/span]](https://blogger.googleusercontent.com/img/b/R29vZ2xl/AVvXsEjYJ-OsqTpjwUx6WGVITW4ZgfpwWcy6ohcmxzywksod6SoNT833CkUghcABUDw6R5szEcgPNIy1G8Hz3TZDw_yvDpGTORLApguLMsj7oKRJufcX5-bwtMQWEBhtLb-vkx_kfMSMIuMsMp4/s1600/Untitled+design-6.png)


